Hoe alle bijlage namen in de berichttekst op te sommen wanneer u een e-mail opstelt in Outlook?
Zijn er goede manieren om alle bijlage namen in de berichttekst in te voegen wanneer we een e-mail opstellen in Outlook? In dit artikel zal ik bespreken hoe u dit in Outlook kunt doen.
Lijst met alle bijlage namen in de berichttekst wanneer u een e-mail opstelt met VBA-code
Lijst met alle bijlage namen in de berichttekst wanneer u een e-mail opstelt met VBA-code
Volg de volgende stappen om deze taak te voltooien:
1. Houd de toetsen ALT + F11 ingedrukt om het Microsoft Visual Basic for Applications-venster te openen.
2. Dubbelklik in het Microsoft Visual Basic for Applications-venster op ThisOutlookSession in het Project1(VbaProject.OTM)-paneel om de modus te openen, en kopieer en plak vervolgens de volgende code in de lege module.
VBA-code: Lijst met alle bijlage namen in de berichttekst:
Private Sub Application_ItemSend(ByVal Item As Object, Cancel As Boolean)
    Dim xMailItem As MailItem
    If Item.Class = olMail Then
        Set xMailItem = Item
        If xMailItem.Attachments.Count > 0 Then
          AddAttachmentNamesToBody
        End If
    End If
    End Sub

3. Klik vervolgens op Invoegen > Module, kopieer en plak de onderstaande code in de geopende lege module, zie schermafbeelding:
VBA-code: Lijst met alle bijlage namen in de berichttekst:
Public Sub AddAttachmentNamesToBody()
    Dim xMailItem As MailItem
    Dim xAttachment As Attachment
    Dim xFileName As String
   Dim xInspector As Outlook.Inspector
    Dim xDoc As Word.Document
    Dim xWdSelection As Word.Selection
    On Error Resume Next
    Set xMailItem = Outlook.ActiveInspector.CurrentItem
    If xMailItem.Attachments.Count = 0 Then
        Exit Sub
    End If
    xFileName = ""
    For Each xAttachment In xMailItem.Attachments
        If xFileName = "" Then
            xFileName = " <" & xAttachment.FileName & "> "
        Else
            xFileName = xFileName & vbCrLf & " <" & xAttachment.FileName & "> "
        End If
    Next xAttachment
    Set xInspector = Outlook.Application.ActiveInspector()
    Set xDoc = xInspector.WordEditor
    Set xWdSelection = xDoc.Application.Selection
    xWdSelection.HomeKey Unit:=wdStory
    xWdSelection.InsertBefore "Attachments: " & vbCrLf & xFileName & vbCrLf & vbCrLf
    Set xMailItem = Nothing
    End Sub

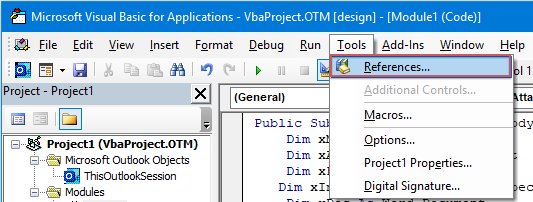
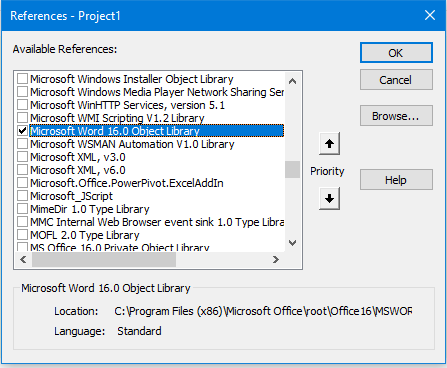
4. Klik vervolgens in het Microsoft Visual Basic for Applications-venster op Tools > References. In het dialoogvenster References-Project1 dat verschijnt, vink de optie Microsoft Word Object Library aan in de lijst met beschikbare referenties, zie schermafbeelding:
 |  |
5. Klik op OK om het dialoogvenster te sluiten, en voeg vervolgens de macroknop toe aan de Sneltoegang-werkbalk. Kies in het nieuwe Berichtvenster Meer Opdrachten uit de vervolgkeuzelijst voor het aanpassen van de Sneltoegang-werkbalk, zie schermafbeelding:

6. Doe in het dialoogvenster Outlook Opties het volgende:
(1.) Selecteer Macros uit de vervolgkeuzelijst Opdrachten kiezen uit;
(2.) Klik op de macro naam die u zojuist hebt ingevoegd;
(3.) Klik vervolgens op de knop Toevoegen om de macro toe te voegen aan de Sneltoegang-werkbalk.

7. Klik vervolgens op OK om het dialoogvenster te sluiten. De macroknop is nu toegevoegd aan de Sneltoegang-werkbalk, zie schermafbeelding:

8. Nu, wanneer u een nieuw bericht maakt en op de macroknop klikt, zullen de bijlage namen worden ingevoegd boven de berichttekst zoals in de volgende schermafbeelding te zien is:

Lijst met alle bijlage namen in de berichttekst wanneer u een e-mail opstelt met een eenvoudige functie
Misschien is de bovenstaande code wat lastig voor u om toe te passen. Als u Kutools voor Outlook heeft, kunt u met de functie Namen Kopiëren snel de bijlage namen van een bericht kopiëren en ze plakken waar u ze nodig hebt.
Nadat u Kutools voor Outlook heeft geïnstalleerd, doet u het volgende:
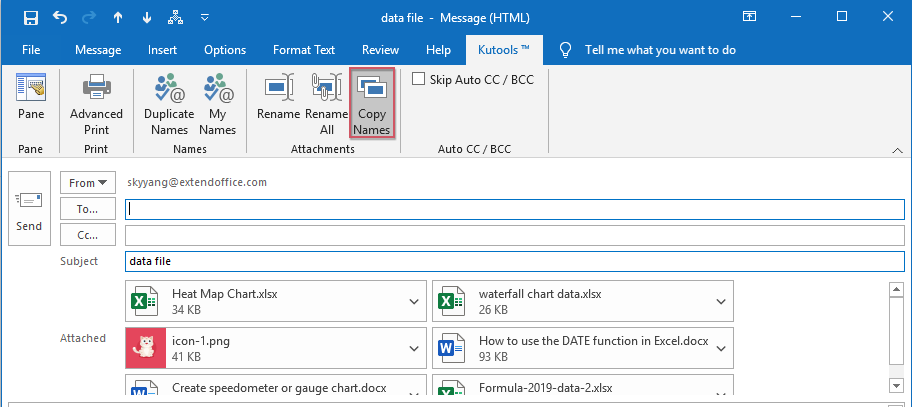
1. Maak eerst de nieuwe e-mail die u nodig hebt, en klik vervolgens in het nieuwe Berichtvenster op Kutools > Namen Kopiëren, zie schermafbeelding:
2. Er verschijnt een meldingsvenster om u eraan te herinneren dat de bijlage namen naar het klembord zijn gekopieerd, zie schermafbeelding:

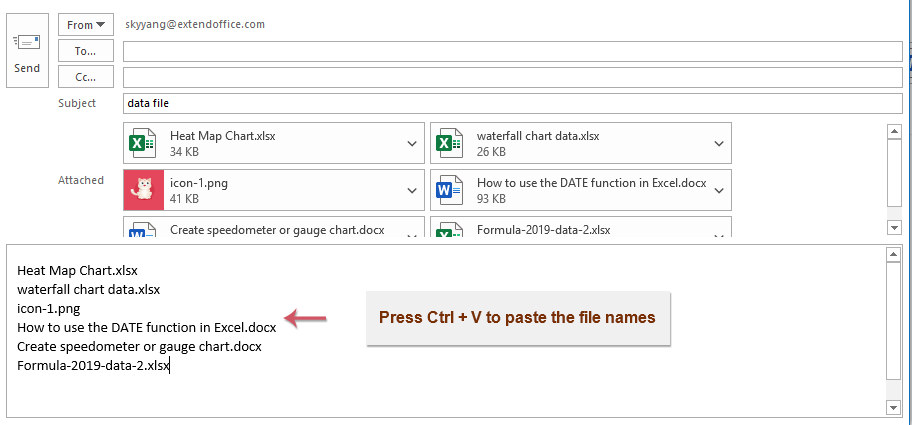
3. Nu hoeft u alleen nog maar op Ctrl + V te drukken om de bijlage namen in de berichttekst te plakken waar u ze nodig hebt, zie schermafbeelding:
Meer gerelateerde artikelen:
- Allen beantwoorden met originele bijlagen in Outlook
- Normaal gesproken, wanneer u de functie Allen beantwoorden gebruikt om een bericht aan alle ontvangers in Outlook te beantwoorden, zullen de originele bijlagen automatisch verloren gaan. Is het mogelijk om de originele bijlagen toe te voegen wanneer u allen beantwoordt in Outlook?
- Bijlagen downloaden/opslaan vanuit Outlook naar een specifieke map
- Over het algemeen kunt u alle bijlagen van één e-mail opslaan door in Outlook op Bijlagen > Alle bijlagen opslaan te klikken. Maar als u alle bijlagen van alle ontvangen en binnenkomende e-mails moet opslaan, heeft u dan een idee? Dit artikel introduceert twee oplossingen om automatisch bijlagen vanuit Outlook naar een specifieke map te downloaden.
- Standaard bijlage-opslaglocatie wijzigen in Outlook
- Hebt u er genoeg van om elke keer de bijlage locatie die u hebt ingesteld te zoeken wanneer u Outlook start? In deze tutorial laten we zien hoe u de standaard bijlage locatie kunt wijzigen. Daarna wordt de opgegeven bijlage-opslagmap automatisch geopend elke keer dat u de bijlagen opslaat, zelfs nadat u Outlook opnieuw opstart.
- Alle bijlagen uit e-mail verwijderen in Outlook
- Normaal gesproken kunt u een bijlage verwijderen door met de rechtermuisknop te klikken en Verwijder bijlage te selecteren wanneer u een e-mail bekijkt. Soms kunnen er veel bijlagen in een e-mailbericht zitten, en kan het vervelend zijn om ze een voor een te verwijderen. Hier bieden we u twee eenvoudige trucs om alle bijlagen in één e-mail te verwijderen, en ook alle bijlagen uit meerdere e-mails tegelijk in Outlook.
Beste Office-productiviteitstools
Breaking News: Kutools for Outlook lanceert een gratis versie!
Ervaar de geheel nieuwe Kutools for Outlook met meer dan100 fantastische functies! Klik om nu te downloaden!
📧 E-mailautomatisering: Automatisch antwoorden (Beschikbaar voor POP en IMAP) / Schema E-mail verzenden / Automatisch CC/BCC per Regel bij Verzenden / Automatisch doorsturen (Geavanceerde regels) / Begroeting automatisch toevoegen / Meerdere ontvangers automatisch opsplitsen naar individuele E-mail...
📨 E-mailbeheer: E-mail terughalen / Scam-e-mails blokkeren op onderwerp en anderen / Duplicaat verwijderen / Geavanceerd Zoeken / Organiseer mappen...
📁 Bijlagen Pro: Batch opslaan / Batch loskoppelen / Batch comprimeren / Automatisch opslaan / Automatisch loskoppelen / Automatisch comprimeren...
🌟 Interface-magie: 😊Meer mooie en gave emoji's / Herinneren wanneer belangrijke e-mails binnenkomen / Outlook minimaliseren in plaats van afsluiten...
👍 Wonders met één klik: Antwoord Allen met Bijlagen / Anti-phishing e-mails / 🕘Tijdzone van de afzender weergeven...
👩🏼🤝👩🏻 Contacten & Agenda: Batch toevoegen van contacten vanuit geselecteerde E-mails / Contactgroep opsplitsen naar individuele groepen / Verjaardagsherinnering verwijderen...
Gebruik Kutools in je voorkeurt taal – ondersteunt Engels, Spaans, Duits, Frans, Chinees en meer dan40 andere talen!


🚀 Eén klik downloaden — Ontvang alle Office-invoegtoepassingen
Sterk aanbevolen: Kutools for Office (5-in-1)
Met één klik download je vijf installatiepakketten tegelijk — Kutools voor Excel, Outlook, Word, PowerPoint en Office Tab Pro. Klik om nu te downloaden!
- ✅ Eén-klik gemak: Download alle vijf de installaties in één actie.
- 🚀 Klaar voor elke Office-taak: Installeer de invoegtoepassingen die je nodig hebt, wanneer je ze nodig hebt.
- 🧰 Inclusief: Kutools voor Excel / Kutools for Outlook / Kutools voor Word / Office Tab Pro / Kutools voor PowerPoint